
Costuming Tidbits for Your Tits and Bits: By Margeaux Le Gogo
Costuming Tidbits For Your Tits and Bits!
By Margeaux Le Gogo

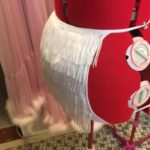
Photo by KTB Designs. MUAH & Styling by the Bombshell Burlesque Academy
Margeaux Le Gogo is a newly debuted burlesque dancer and costume enthusiast. Starting burlesque at the Bombshell Burlesque Academy fronted by the fabulous Lila Luxx, she has developed her skills in costuming and is sharing what she’s learnt through her blog “Bobbins, Blush, and Bettie Bangs” (www.margeauxlegogo.squarespace.com/blog).
As a fan of vintage glamour, discovering burlesque was like finding my soulmate. I have been interested in fashion since I was a child but realising the neverending limits of burlesque costuming has inspired and motivated me to create like nothing else has before. I am mostly self taught but I never feel like not knowing how to do something is a reason not to do it. I think it is part of the spirit of burlesque that we all are willing to try some unskilled DIY. Often it’s due to budget and sometimes it’s due to the fact that it’s difficult for an artist to have someone else translate your vision into reality. For me it’s an unwillingness to relinquish control combined with the fact that making things is my favourite part of burlesque.
Over the course of making burlesque costumes and props there have been a lot of tip and tricks I have learnt. Most of the learning has happened when I’ve hit a roadblock, which is something pretty universal. I’ve also learnt a lot from other burlesque dancers as well as sewing bloggers. So before you rage quit and throw your sewing machine across the room, check out my list of things I wish I’d learnt about sooner.
- The walking foot
This will Change. Your. Life. I once tried to alter some shapewear to look like a $300 designer bodysuit (which is quite the joke itself). I cut out the cut-outs and started sewing the edges for structure and neatness. I used a zigzag stitch so that I could maintain the stretch of the fabric and sew-all polyester thread so that my seams could handle some tension. It ended up looking like S-H-I-T. The stitches were all over the place and so so many were skipped. Nothing was smooth and flat but had a wavy and warped look to it. I tried endlessly to make it work but it just wouldn’t. I started to think that maybe it was me (sob). I was planning a project using a gorgeous and expensive leopard print stretch velvet and I didn’t want this to happen to me again. So I started researching and that’s when I found the walking foot.
This little piece of steel and plastic and other stuff will make sewing any stretch fabric a dream. Also know as an even feed foot, it is also used for quilting and other instances where you are sewing 2 or more layers or fabric that has trouble feeding through as well as to perfectly match patterns. It works by having feed dogs on the foot itself that in addition to the ones on the machine. This means that the fabric will feed through without stretching and your stitches will be perfect and your seams flat. It’s the type of thing that will make your sewing life sew much easier. (I’m sorry but I had to do that. I can’t resist a pun!)
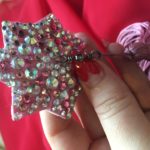
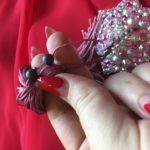
- Fishing tackle for you tassels
I learnt this tidbit from superstar Lenore Noire. Using a fishing swivel to attach your tassel to your pastie means better twirling and being able to easily change your tassels. You can easily attach the swivel to the pastie by hand sewing one of the rings to the centre. You then attach your tassel by feeding the end of the loop through the ring then feeding the tassel through the loop and tightening. Alternatively you can get swivels with carabiner-style clips. The next tackle item you need is stinkers. You can hide sinkers inside you tassels to give them extra weight for top-notch twirling. Just hold the tassel upside-down and find a strand in the very middle. Thread the strand through the sinker then tie a double knot. If you can’t tie a knot big enough to stop the sinker from slipping off and becoming a potentially dangerous projectile, find a
- Scalpels for even quicker unpicking
Sometimes a quick unpick really isn’t that quick. Plus if it’s not that sharp you can actually end up causing a lot of damage. And when it comes to fine fabrics it can become downright dangerous. So get a scalpel instead. You just need to gently insert the point into the seam and carefully run it along the seam. Carefully is the keyword. If you slip you can easily cut through the fabric itself. But it’s so much faster and easier and takes away some of the pain of unpicking. I’m yet to try it with tulle and stretch fabric, but to be honest anything would be better than a standard stitch ripper.
- Going from Granny to Showgirl in a few easy steps
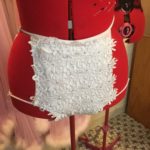
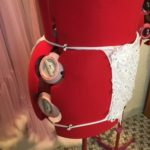
I learnt this trick from the costume master Coppelia Jane. A pair of high-waisted granny panties can become the showgirl scanties of your dreams with nothing more than some scissors and some trim. If you cut away the sides of your knickers, but leave the elastic bands at the waist and leg intact, you can make an impressive pair of showgirl panties. Put your panties on and mark the point where you would like your coverage to go to (add on a little to account for the loss in tension) then cut away. As underwear is made of stretch fabrics that don’t fray, you don’t even need to hem the edges. You can however if you wish, just make sure you take into account a seam allowance when cutting the sides.
As all of the stretch is taken up by the elastic bands at the waist and legs, you can sew anything you like to the panels. You don’t even need to stretch the fabric when you sew or use a stretch or zigzag stitch. I have sewn non-stretch sequined fabric, lace, and multiple layers of fringe to the panels of my new showgirl panties using just a regular straight machine stitch. Another thing you may want to do is line the front panel or add a layer of fusible interfacing. Sometime the front panel can gape at the sides due to the tension being taken away when the sides are cut out. To combat this you could try either lining or interfacing the panel or adding a small dart on either side, or both. If not, double sided tape is always your friend.
When finished you can easily make the panties tear away by adding snaps. You can also add extra straps, crystals, fringe, anything you can think of. You can also get creative with the shapes of your panels.
- No sew magnetic snaps
These are one of the best things I have ever found. Since I posted about these on social media I have had quite a few people ask me about them. Most people know about magnetic snaps. They offer a more reliable hold then regular snaps and are way cooler. But they didn’t eliminate the annoyingly tedious step of having to sew on the snaps. I hate hand sewing. I will do almost anything to avoid hand sewing. So to me these are amazing. I purchased these from an australian website (http://www.sewcreativesupplies.com.au/) that ships worldwide, but you should be able to find them on eBay and other places.
To attach you simply push the 2 tabs on the back through the fabric (you may want to make a little hole with an awl* first), place the plate on the back side with the tabs going through the slots, then bend the tabs down, and et voila! So easy. You don’t even really need any tools as I found the easiest way to bend the tabs is with tweezers. The backing is more visible if you use the plates so you may want to consider not using them or painting or covering them to conceal them.
- Fixing fishnets
I bought a pair of the wonderfully shaping and holding Capezio professional fishnets for the first time and then promptly destroyed them on the first wear. As they are made out of a magically strong combination of nylon and spandex, this was not an easy thing to do. I some how managed to get them caught on the busk of my corset and ripped a hole in them. As I paid a fair bit of money for them and didn’t even get to wear them on stage once (I damaged them during class) I was determined to fix them instead of replacing them. I very easily found a tutorial on instructables.com (http://www.instructables.com/id/How-to-Repair-your-Fishnet-Stockings./) and found that fixing fishnets is actually very easy. The only things you need are a needle, needle threader, and woolly nylon. Woolly nylon is an 100% nylon stretch thread used for overlocking (serging). It is made up of lots of loose nylon fibres so the needle threader is necessary as trying to thread it through the needle without is difficult. To repair the fishnet you just need to slightly stretch the area out and use the thread to replace whatever was torn. The hardest part is matching the colour of your fishnets to the woolly nylon (if they’re skintone fishnets). The woolly nylon I got was a little bit lighter than my fishnets but I was able to darken it with foundation. If the woolly nylon is too dark then you can get white and stain it to the correct colour with your foundation. The hole is now completely unclockable and the tights look brand new again!
*Bonus tidbit – the awl
An awl is a tool used to make holes in things. It may not seem that exciting but thing little thing just keeps making me happy for buying it. I initially bought it to make holes to fit the posts of a busk through when making a corset but I have since used it to make extra holes in straps for shoe buckles, make holes through thick stiffened felt and foam sheets for headdress construction, and as I said earlier to make holes to fit the no sew magnetic snaps. I’m sure my awl will continue to come in handy for many other yet to be realised purposes.
I hope you found something useful in the above list. And if you’re interested in reading more about burlesque costuming as well as other burlesque topics, head over to my blog at www.margeauxlegogo.squarespace.com.
xo Margeaux